For my art quilt homework assignment, I chose a Chinese alligator as my subject.
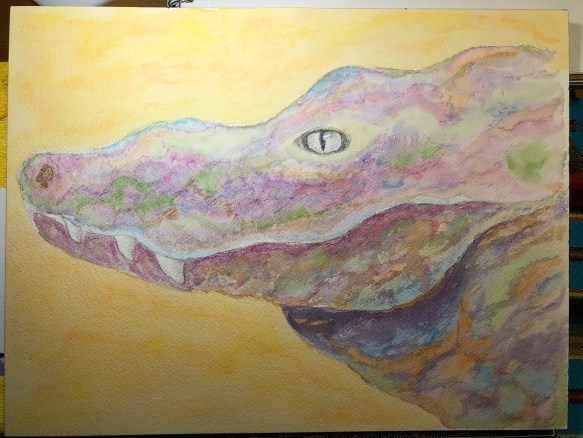
Chinese Alligator #27
The homework assignment is due in October 2018. That may sound like a lot of time, but I can tell you, it is not. Here’s my plan.
(1) Sketch the alligator on paper (number unknown)
(2) Paint the alligator on watercolor paper (27)
(3) Sketch the alligator on fabric (TBD)
(4) Paint the alligator on fabric (TBD)
(5) Sketch and paint the alligator on fabric, full size, approximately 27 x 34 inches (planned for only once, but we’ll see)
(6) Quilt the alligator (planned for only once, but we’ll see)
Steps 1-4 are studies or prototypes, leading up to the final product. I didn’t track how many times I sketched the alligator for Step 1; lots, that’s for sure.
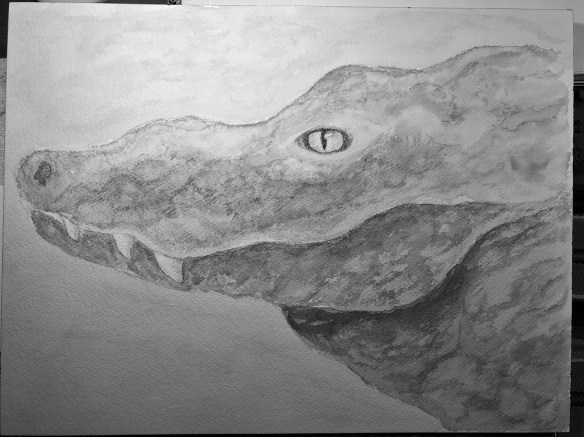
I just finished Step 2: alligator in watercolor. I numbered these prototypes and I made 26 before I was mostly happy with the result. Most of the 26 prototypes are on 5×7 watercolor paper. I then painted #27 on 300-lb 12×16 watercolor paper. I’m thinking of naming her Mona Lisa or maybe Here’s Looking At You, Kid!
Here is it in black and white, a useful version to determine the level of value changes.
This is the photo I’m using as my subject, from Wikipedia. The photo is by Greg Hume. I really like to work off of my own photos, but there wasn’t any way I’d be able to photograph a Chinese alligator. Greg allows this photo to be used as long as he is credited. Easy to do. Thanks a million, Greg!

Photo by Greg Hume (from Wikipedia)
I move on from one step to the next when I am okay with the current result. I’m not waiting for it to be perfect, otherwise I’d never finish. By the time I get to the final steps of sewing, painting, and quilting on the full size version, I will have gained even more experience. I hope the final product looks like the version I see in my mind.
More updates after the next step is finished!